Installing a caching plugin is the most effective way to accelerate the page loading speed of WordPress websites. For WordPress, there are many caching plugins available, such as W3 Total Cache, WP Super Cache, WP Fastest Cache, etc. Out of all, we’ve used W3 Total Cache plugin to prepare this knowledgebase article
In this tutorial, we will assist you to install and configure W3 Total Cache plugin to maximize the caching benefits.
- Login to WordPress dashboard.
- Navigate to Plugins menu, and then click on Add New.

- On the next page search W3 Total Cache, and you will see the list of WordPress cache plugins.

- Click on Install Now button for W3 Cache Plugin.
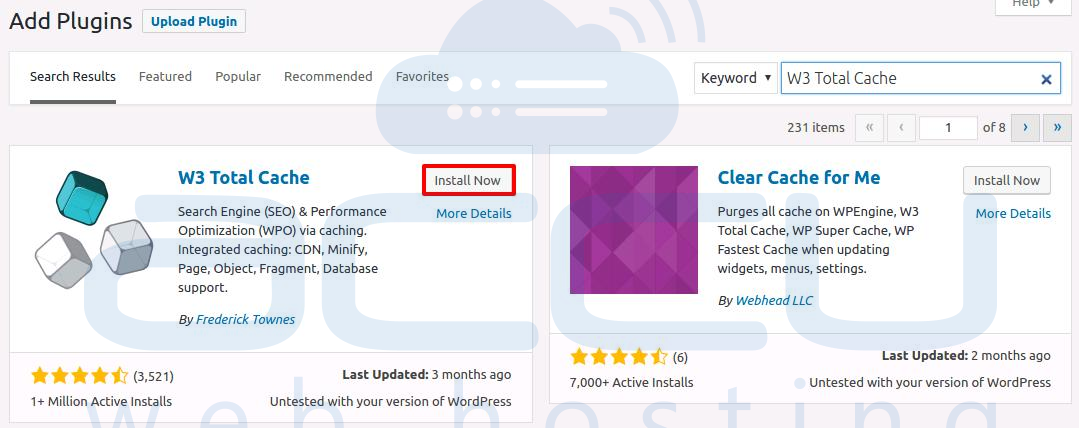
- Once the W3 Cache Plugin is installed, click on Activate button to enable it.

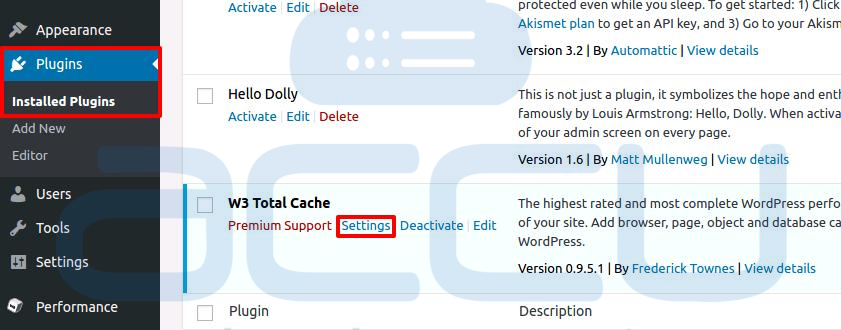
- Now, go to Plugins → Installed Plugins and click on W3 Cache Plugin Settings.
- On the next screen, you'll see various cache settings to be configured. Page Cache option will create and store a static version of visited pages on your server, so that it can be served immediately to the browsers. Check the checkbox to enable this option. In Page Cache Method drop down menu, select Disk: Enhanced option and click on Save all settings button.

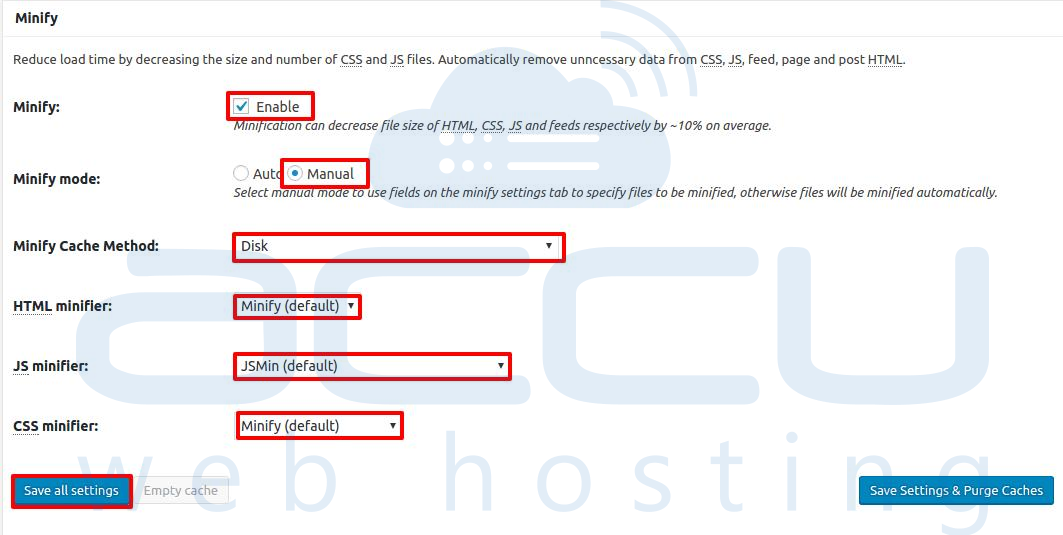
- Minify option will minify (compress) HTML, CSS and Javascript files. It is the process of removing all unnecessary characters from source code without changing its functionality. Change the settings as shown in the following image, and click on Save all settings button.
-  Enable Database Cache to save the data retrieved from the WordPress database. In Database Cache Method drop down menu, select Disk, and click on Save all settings button.

- Enable Object Cache to further reduce an execution time for common operations. In Object Cache Method drop down menu, select Disk option, and click on Save all settings.

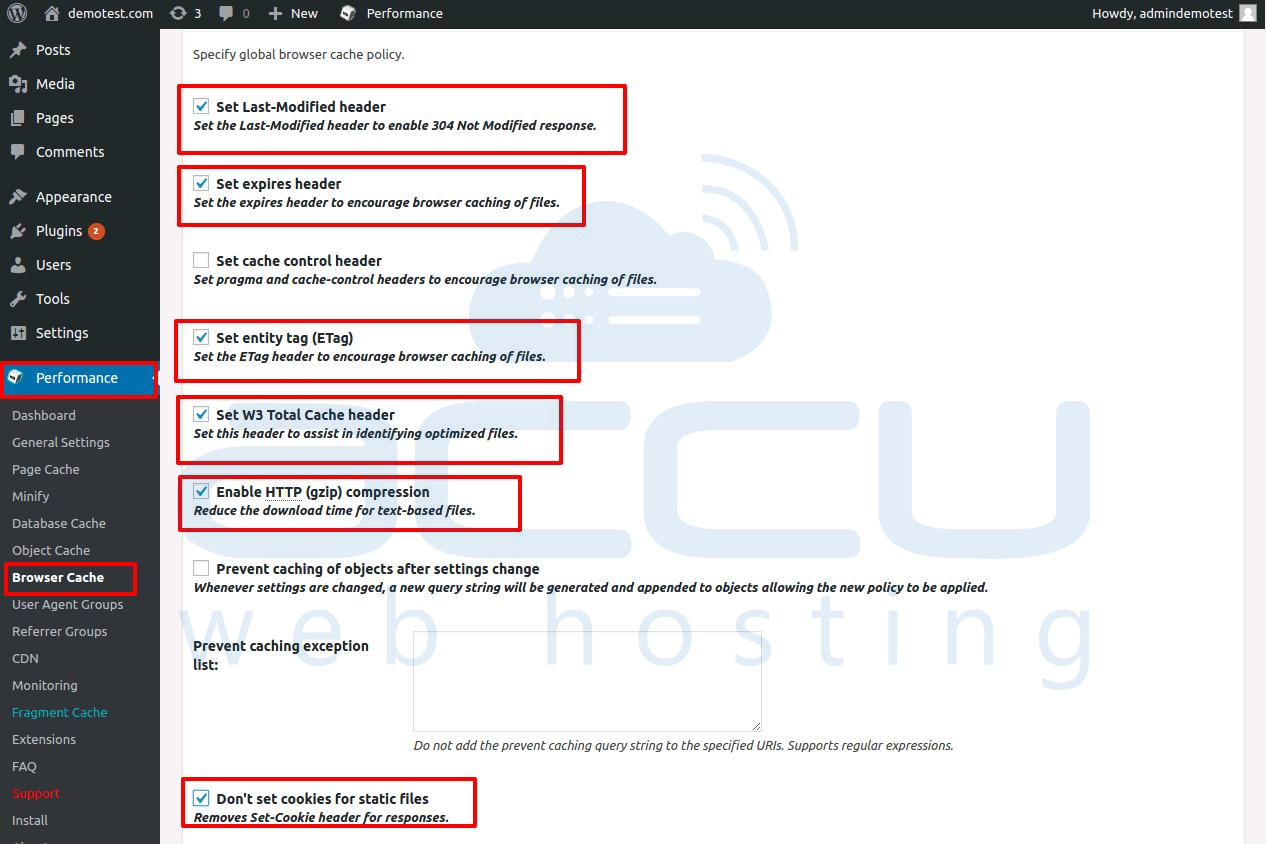
- Browser Cache reduces the server load and decreases the response time by using the cache available in site visitor's web browser. Change the settings as shown in below image, and click on Save all settings.
- CDN (Content Delivery Network) is a large distributed system of servers deployed in multiple data centers on the Internet. It is an interconnected system of computers on the Internet that provides web content rapidly to numerous users by duplicating the content on multiple servers.
To integrate CDN with your WordPress website, refer to our knowledgebase article. If you are not using CDN then you might want to disable Automatically upload modified files.
- Now, we'll configure Minify settings further. Go to Performance → Minify.

- In General setting tab, enable Rewrite URL structure, leave the other settings intact and click on Save all settings.

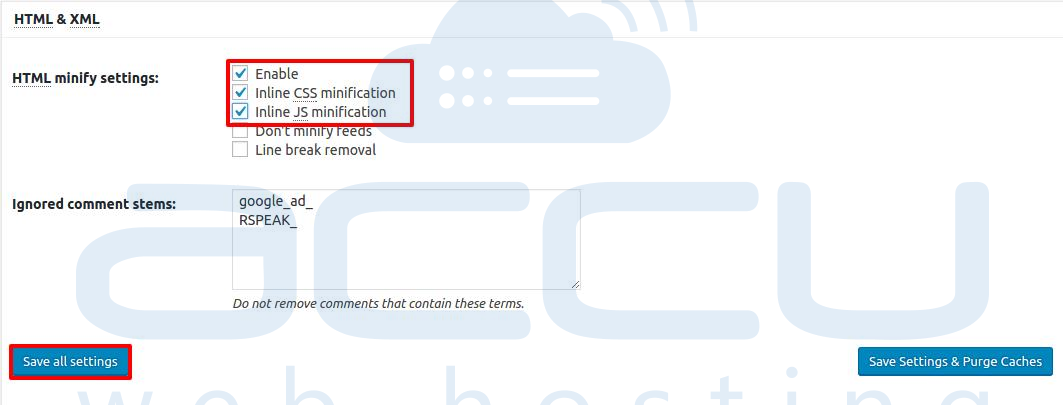
- In HTML & XML tab, enable HTML minify settings as shown in below image, and click on Save all settings.
- In JS tab, configure JS minify settings as shown in the following image.

- In JS file management, select your theme and click on Add a script button, and specify Javascript file path to mention the main Javascript files one by one. At one more advanced level, you can put your theme Js files in the correct order.Please note that incorrect order may cause improper website render. Also, there is no way around to go through each Js file.

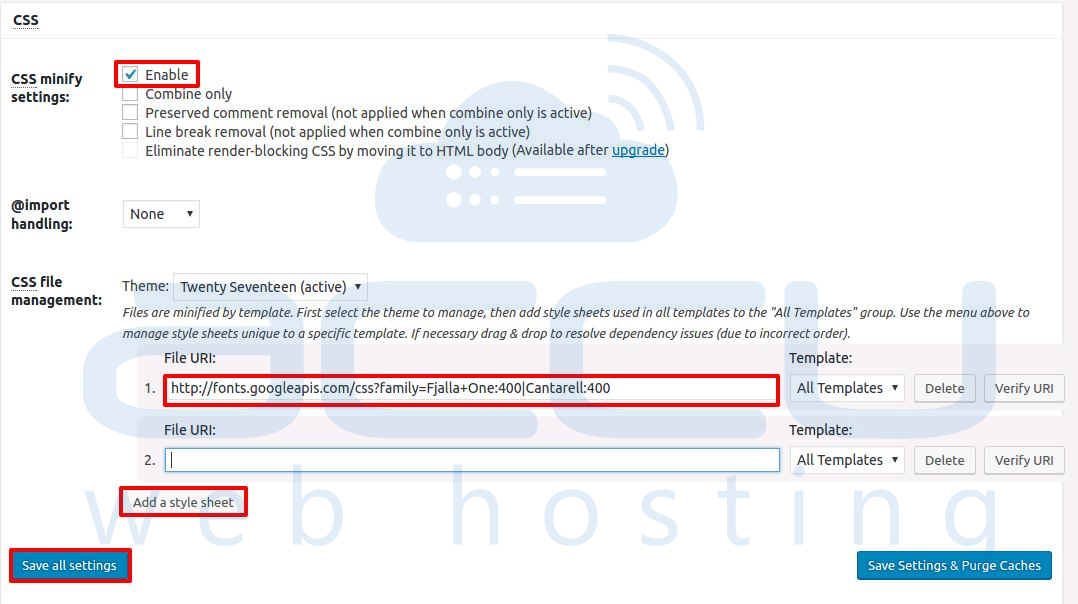
- In CSS, enable CSS minify settings. Leave other settings intact. Under CSS file Managment, Click on Add a style sheet button and specify the path of your CSS files. You need to view your HTML source for your actual list of stylesheet URLs.Once all the CSS files are added, click on Save all settings.
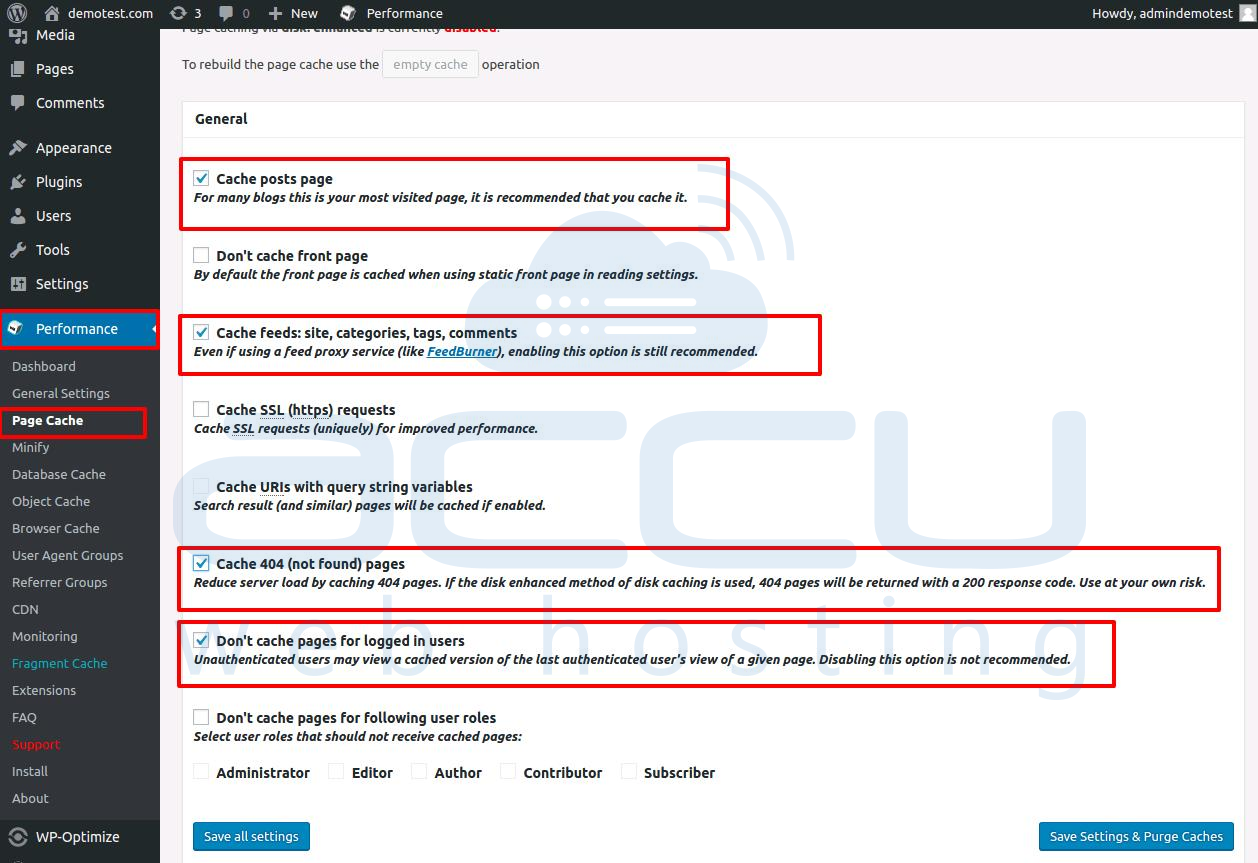
- Tweak the Page cache settings from Performance -> Page Cache.
- Tweak Browser cache settings from Performance -> Browser cache.

