Step: 1
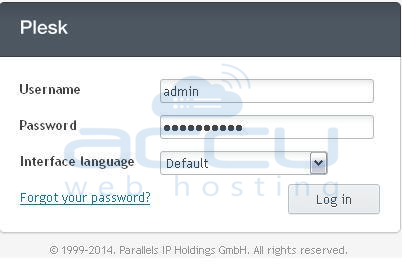
Login to the Plesk Panel:URL: http://IP-address:8880
Username: admin
Password: As per set by you
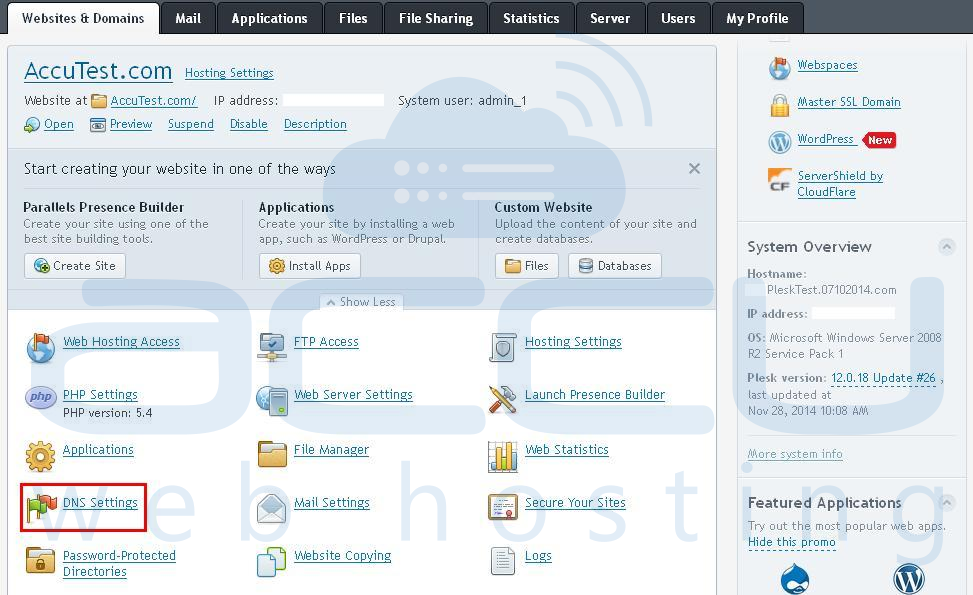
Here, you will be able to see the dashboard. Please select the domain and click on the “DNS Settings†to add/edit the DNS records.
Step: 2
In order to add DNS records, please click on the option “Add Recordâ€, as shown in following image: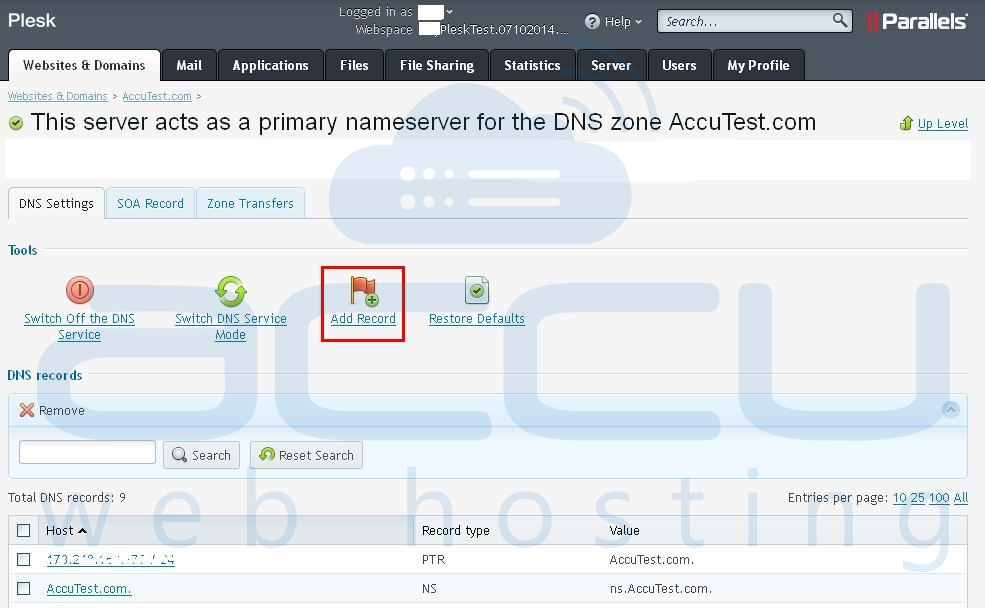
Step: 3
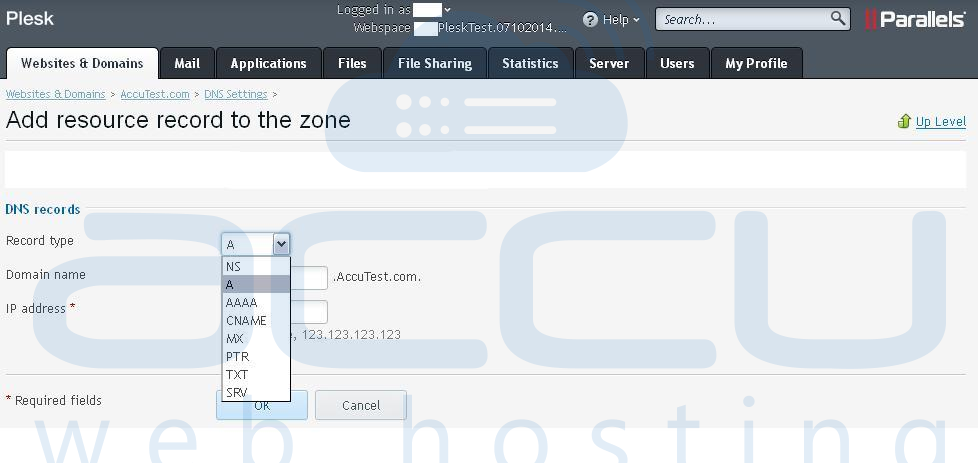
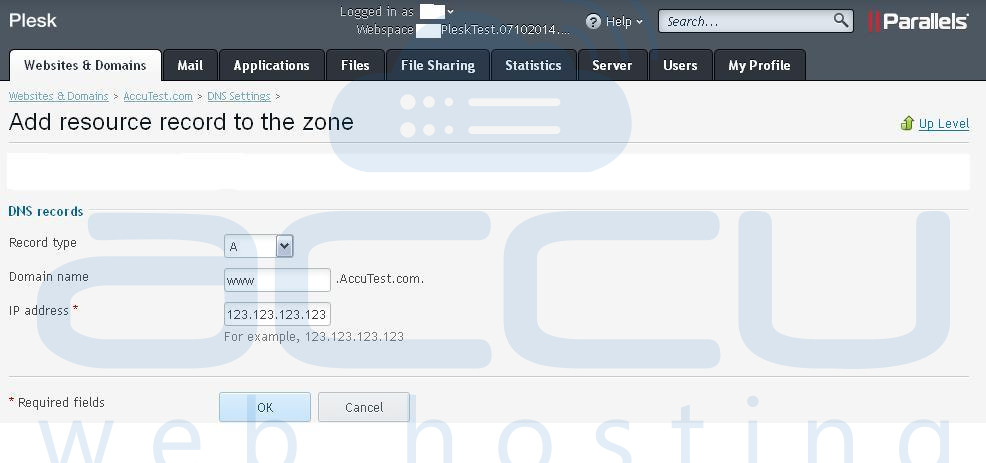
To add A record, please refer to below mentioned steps:Select Record Type: A
Domain Name: Here, put the required name. e.g., www
IP address: Enter appropriate IP address.
Once, all details are added, click on “OKâ€.
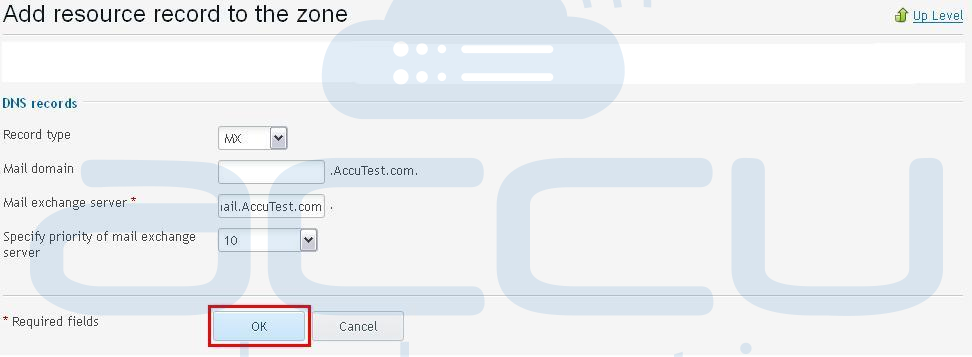
To add, MX record, please refer to below mentioned steps:
Select Record Type: MX
Mail Domain: Leave Blank
Mail exchange server: Here, put the appropriate domain name. e.g. mail.AccuTest.com
Specify priority of mail exchange server: Here, put appropriate priority e.g. 10
Once all details are added, click on “OKâ€.
Step: 4
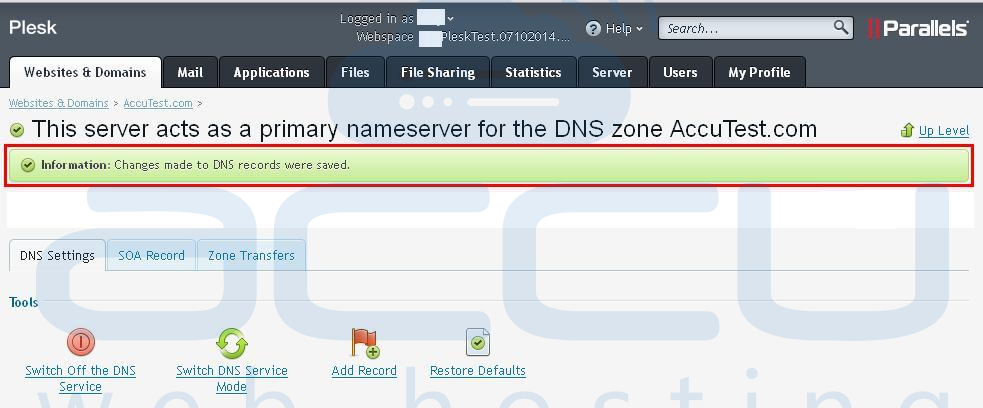
Now, you will need to update the DNS records to save the changes. Please refer to below screen captures: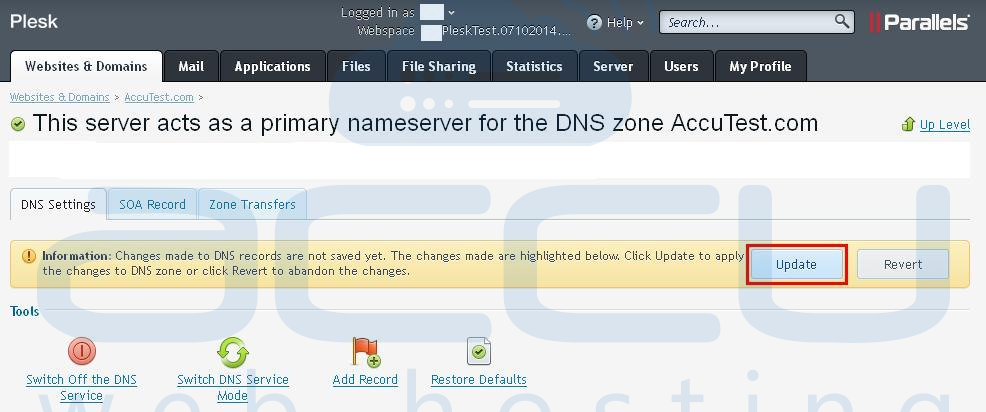
Edit DNS Records of a Domain:
In order to edit a DNS record, you just need to click on the particular record as shown in below image: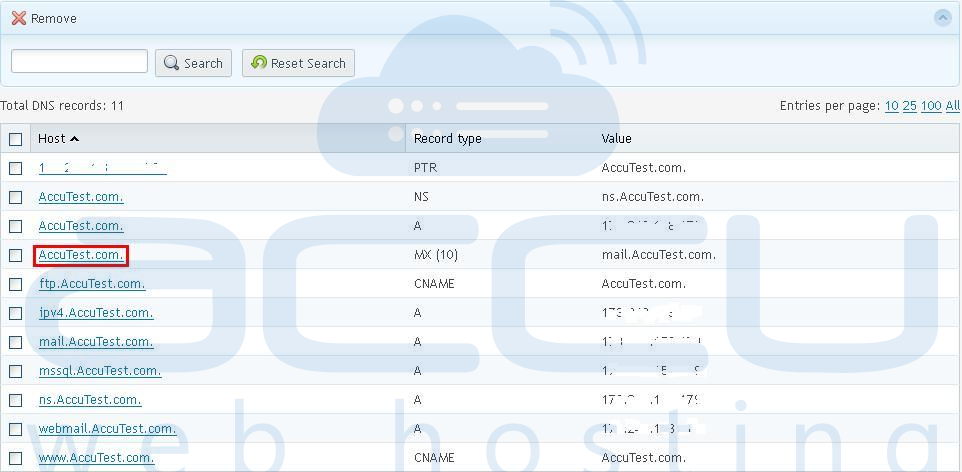
Now, you can make required changes in the DNS record and save them.
