Upload Mean.js Files via SFTP In FileZilla
Once your mean.js webcontent is ready, you need to perform following steps to upload it to your Linux VPS via SFTP.We have used FileZilla FTP client in this article.
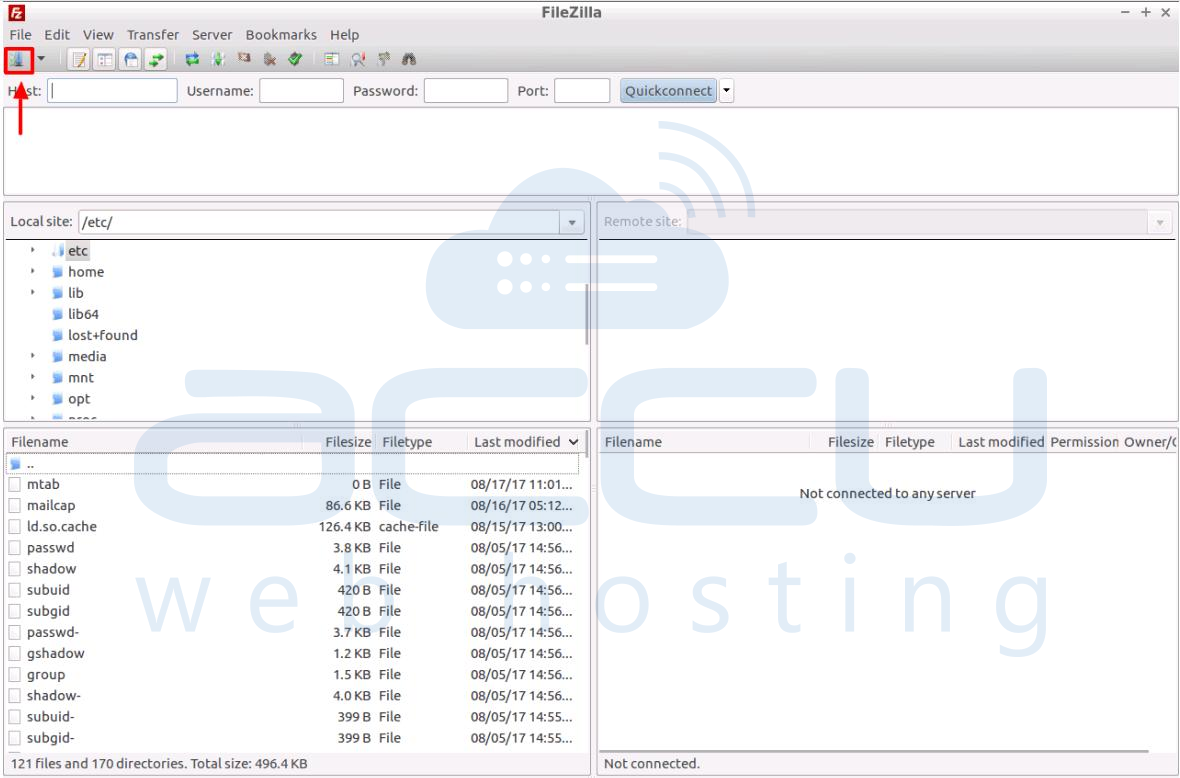
- Open FileZilla.
- Click on “New Site†button.

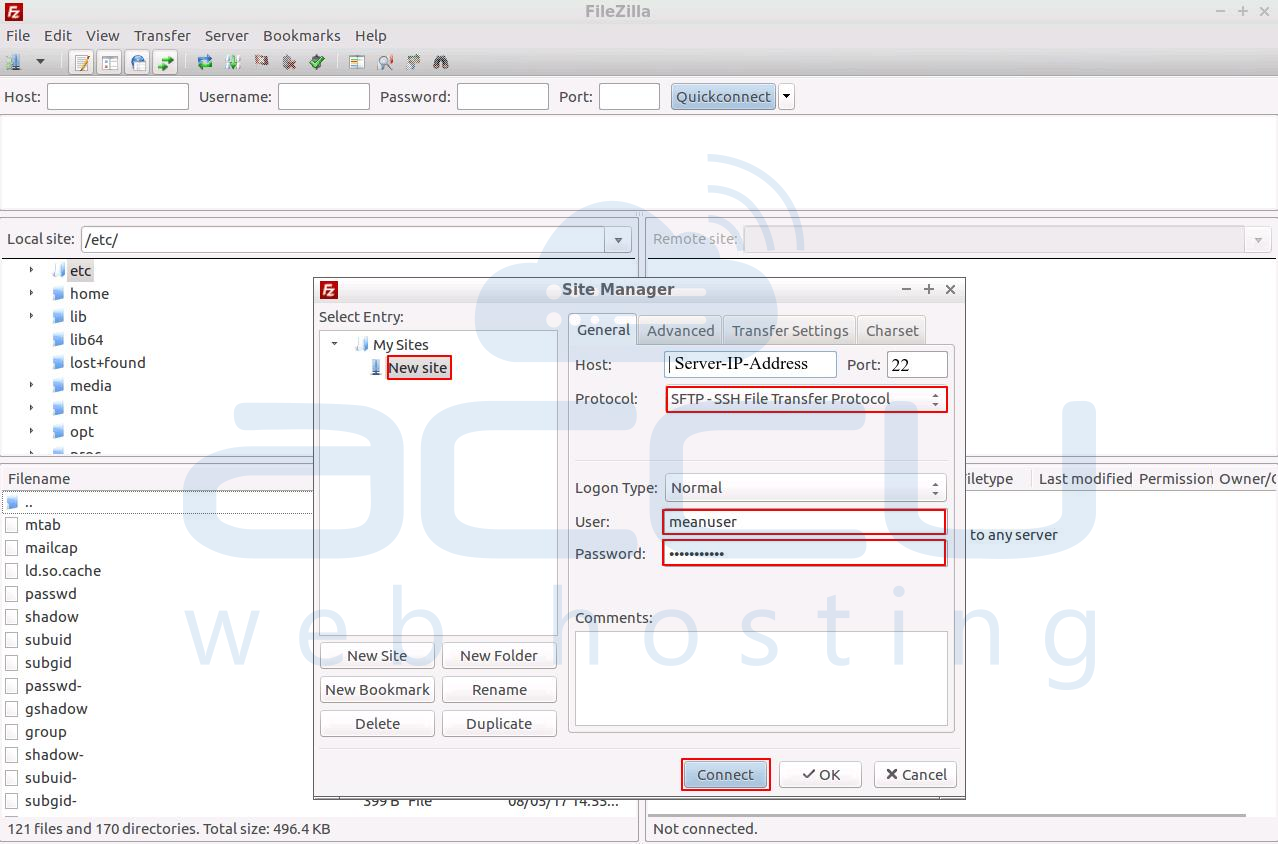
- Enter following details and click on Connect.
Host: Your server/VPS IP addressPort: The standard ssh port number is 22. Specify if you are using any non-standard ssh port number.
Protocol: select SFTP- SSH File Transfer Protocol from drop-down.
Username: SFTP username
Password: SFTP user password
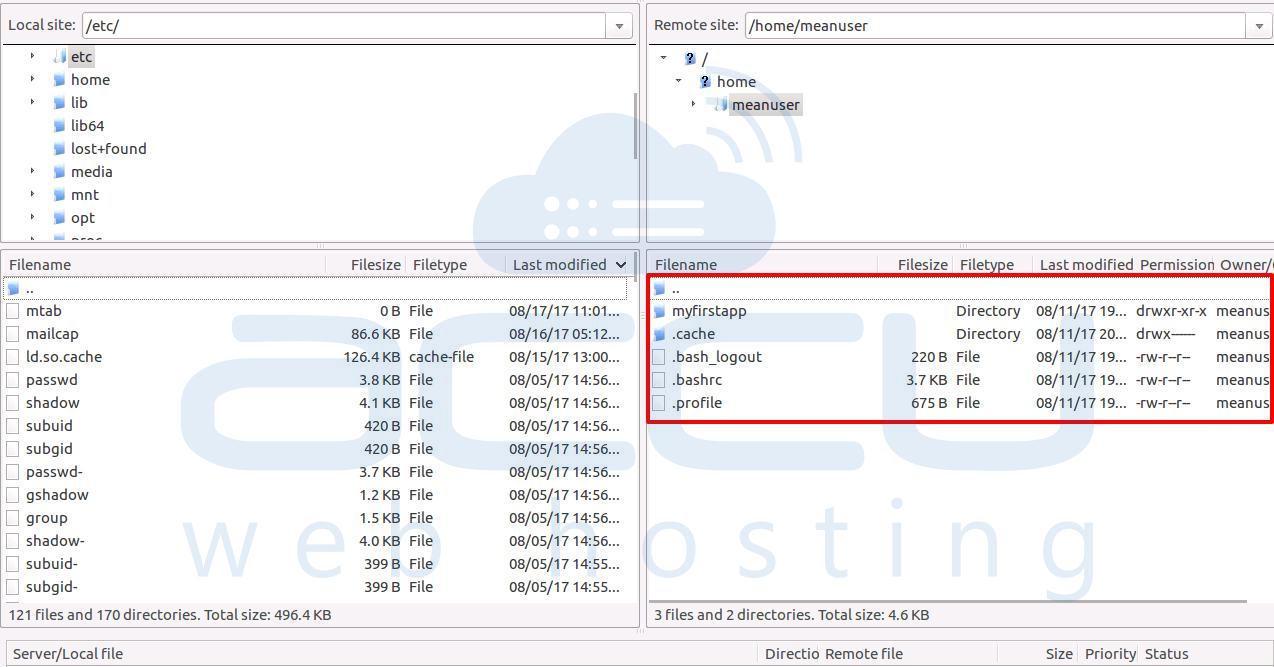
- It will connect you to your SFTP user home directory.Upload your mean.js webcontent here.

Auto-start Mean.js Application On Boot
Once, you upload your application, It is crucial to keep get your application auto-started after a reboot, shutdown or system crash event.You just need to add a cronjob with following steps.
- Login into your Linux VPS via ssh.
- Create a new file in your application's home folder with name app-autostart.sh(you can choose any name ending with .sh extension).
cd /home/folder/path/of/your/application
Add below script to the file.
Nano app-autostart.sh
Replace the main.js with your application’s main script file and -sourceDir path should be the path where your upload your mean.js webcontent.#!/bin/sh if [ $(ps -e -o uid,cmd | grep $UID | grep node | grep -v grep | wc -l | tr -s "\n") -eq 0 ] then export PATH=/usr/local/bin:$PATH forever start --sourceDir /home/folder/path/of/your/application main.js >> /path/to/log.txt 2>&1 fi - Create a cronjobto autorun this script on each reboot.
crontab -e
And add following code:@reboot /path/to/this/script/app-autostart.sh
Point Domain To Your Mean.js Application
You need to point your domain to created application so you can access it with http://yourwebsitename.com.
To accomplish this, you need to install a Nginx Web Server with following steps.
- Login as Root user to the your server/VPS via SSH.
- Run the installation command
sudo apt-get install Nginx -y
- In order to specify your domain linking to your server’s IP address, create new .conf file with yourdomainname.conf
nano /etc/nginx/conf.d/accuweb.com.conf
Add following code:
server {
    listen 80;

    server_name your-domain.com; # Change the domain name

    location / {
        proxy_pass http://localhost:{YOUR_PORT};  #Change the IP and port on which your application is running
        proxy_http_version 1.1;
        proxy_set_header Upgrade $http_upgrade;
        proxy_set_header Connection 'upgrade';
        proxy_set_header Host $host;
        proxy_cache_bypass $http_upgrade;
    }
}
Replace your-domain.com with your websitename.com and http://localhost:{YOUR_PORT} with http://VPS-IP-address:3000; - Start the Nginx webserver service.
sudo /etc/init.d/nginx start
- Now at the DNS management console of your domainname, create A record to point to IP address of the server on which your application is running.
Please note that you will need to create a separate .conf file at for all websites you add to your VPS.
