This article will guide to enable TLS 1.2 on Windows 7.
TLS is a replacement of the Secure Sockets Layer protocol (SSL). It provides secure communications on the internet. It is used for web browsers and other applications that require data to be securely exchanged over a network such as an email, file transfers, VPN connection and voice over IP.
Windows 7 supports TLS 1.1 and TLS 1.2. But these protocol versions are not enabled on it by default. On Windows 8 and higher these protocol are enabled by default. Follow the steps below to enable TLS 1.2 on Windows 7.
- Click on the Windows button located on the Status bar and then click on Run button.

- In the run field type the text "regedit" and click on Ok button to open the Registry editor.

- Once you click on the Ok button, you will get the following windows.

- Browse the following registry key in this windows.
HKEY_LOCAL_MACHINE\SYSTEM\CurrentControlSet\Control\SecurityProviders\SCHANNEL\Protocols
- Right click on the Protocols folder and select New and then Key from the drop-down menu.

- Once you click on the key option, this will create a new folder “New Key #1â€. You have to rename it with the name “TLS 1.2â€.

- Right click on the TLS 1.2 key and select New and then Key from the drop-down menu.

- By clicking on the key option, this will create a new folder “New Key #1â€. You have to rename it with the name “Clientâ€.

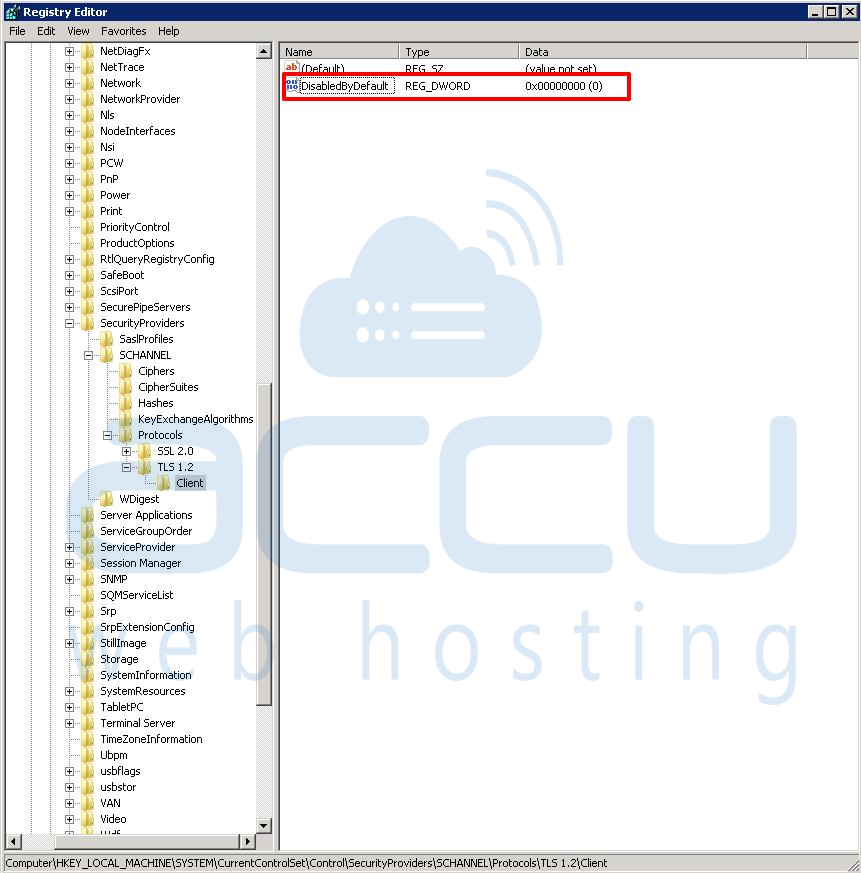
- Right click on the Client key and select New and then DWORD (32-bit) Value from the drop-down list.

- Once you click on the DWORD (32-bit) value. It will create a file with the name “New value #1â€. You have to rename that file to DisabledByDefault.

- Once all the steps are completed, reboot the system to implement the changes.
